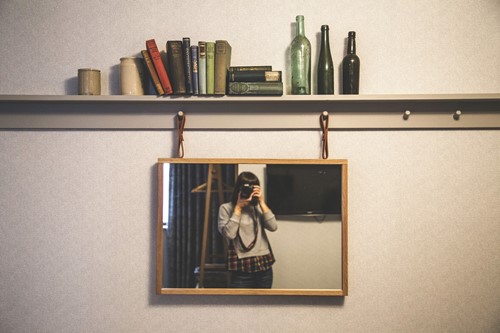
DIY Guide: Stepping Stones for Your Garden

Stepping stones are a perfect alternative to traditional garden paths. For small spaces or for a more rustic look, stepping stones can liven up a space while providing helpful functionality. There are many styles of stepping stone, such as those made from flagstone or concrete pavers. However, pebble stepping stones are a fun and creative addition to any yard or garden. The best thing about them is that they’re simple to make yourself. Here we’ll go over how to make your very own stepping stones.

Materials

Smooth stones or pebbles
Mortar

Equipment

Paintbrush
Rubber mallet
12×12 inch concrete mold
Protective gloves

Process

  1. Fill the mold with dry mortar, leaving about 1/3 inch at the top.

  2. Level the mortar either by hand or a small float, smooth out the mortar into an even surface. Use protective equipment to avoid skin burn or irritation from the mortar.

  3. Begin arranging the stones by nestling them into the dry mortar. Place them so they are snug against one another and stand up without tipping over.

  4. Because the mortar is still dry, you don’t have to worry about planning a design ahead of time. You can change stone placement as much as you need to make the perfect pattern.

  5. Once the stones are where you want them, use the rubber mallet to tamp them down. Try to make them level with the top of the mold. You can use a piece of wood, a ruler or any other flat object to test the level.

  6. Use the paintbrush to dust off the surface of the stones to remove any extra dry mortar.

  7. Slowly add water to the mortar using a spray attachment on a hose. Keep the water pressure low so that it does not send stones and mortar flying. Plan to do several light rounds of watering rather than drenching the mold.

  8. To test the moisture, use the mallet to tap on the stones. Watch for bubbles to appear or excess water to drain out when you tap the stones—this is your cue to stop watering.

  9. Take your thoroughly damp stepping stone mold to a covered but well-ventilated spot. The mortar will need to cure and harden for at least 48 hours before your stepping stone will be ready to use.

  10. The stepping stone should be hardened and cured after two days. Carefully remove the mold and wash away any loose mortar with water and a paintbrush.

Now you have a beautiful custom stepping stone for your garden. Repeat the process to make an entire path or keep them as standalone points of interest in your landscaping.

The Top 5 Homemade Housewarming Gifts

Photo by Kelly Lacy from Pexels

When someone you love moves into a new home, you often want to celebrate this milestone and help them feel more comfortable in their new surroundings. It is common to purchase a housewarming gift for a friend or relative after they move but the next time you are in need of this type of present, you might want to consider making it yourself. A homemade housewarming gift is a gift from the heart and something that the recipient will treasure for years.

Here are 5 housewarming gifts that you can craft yourself:

Mason Jar Houseplant

A houseplant can bring new life into any home, but when you create a homemade display for the houseplant it will feel even more connected to the new home. This craft is very simple and only requires you to get a mason jar, some soil and a small houseplant. You can plant it right inside the glass mason jar and use whatever you have on hand to decorate the jar. You may be able to use vinyl to add a saying to the jar such as “Home Sweet Home” or “Planted With Love.” Or you could simply tie a piece of ribbon around the jar for a decorative accent.

A Set of Painted Wooden Spoons

Most new homeowners are looking for practical items that can make daily life easier. Wooden spoons are a staple item in any home since they are used for both cooking and baking on a regular basis. Instead of gifting your friend a set of basic wooden spoons, you can add a touch of love by painting them yourself. You can paint them any color or design that you think your friend would enjoy, or you could consider a neutral paint with simple words on the spoons such as “stir,” “fold” or “spoon.”

Homemade Address Sign

When someone relocates to a new home they often feel like they are living in someone else’s house until they make their mark on their new property. By gifting someone a homemade address sign, you can help them immediately feel like the house is more theirs than the previous owners. A small wood plank, some address numbers and colorful paint will help you get this craft done.

A Set of Crafted Coasters

For simple, fun and useful homemade gift, you may want to consider a set of coasters. You can create your own coasters with extra scrapbook paper, white ceramic tiles and plenty of spray sealer. Simply adhere the paper to the tiles and spray the sealer over it and let it dry.

Handmade Wreath

Another loving and thoughtful gift to create for a family member who has moved into a new home is a handmade wreath. You can create a floral wreath, a traditional green wreath with festive accents or a ribbon wreath that is bursting with personality.

A handcrafted gift is sure to mean more than something that you quickly picked up at the store before heading to your friend’s new house. These housewarming gifts are fun to make, but even more enjoyable to give away. Not only are they beautiful and thoughtful, but they also are practical and useful.

Weekend projects to make your home more energy-efficient

While many home improvements have a lengthy process, there are plenty of upgrades you can accomplish as weekend projects. One way to spend a weekend improving your home is to add upgrades and changes that will help lower your utility costs. Here are some ideas for weekend projects to make your home more efficient and cost-effective:

Install a smart thermostat

Adding a programmable smart thermostat is an excellent weekend project that can save you money and make your home more energy efficient. With a smart thermostat, you can set specific schedules for heating and cooling. Many of them have features to adjust the temperature automatically based on activity. Smart thermostats can help you save energy and are simple and quick to install.

Upgrade your appliances & fixtures

Home appliances can be a major source of energy waste, and luckily, replacing them can be accomplished in a single weekend project. Modern refrigerators, dishwashers, and ovens have energy-saving features to help you keep your costs down and your home more efficient. Even smaller appliances like coffee makers or microwaves can be swapped out for energy-saving alternatives. For fixtures, consider replacing your sink faucets with low-flow options to save water.

Touch up your weather stripping

Even modern homes can lose significant amounts of energy through leaky windows. If you want to keep your heating and cooling bills down, touching up the weather seals on your windows can help you ensure your HVAC system is performing at maximum efficiency. You can purchase caulk and other simple-to-use products at your local home improvement store or online to solve and prevent leaks.

These are just a few ways to help your home be more energy-efficient. If you’re interested in a more cost-effective and eco-friendly home, consider these home improvement ideas for your next weekend project.

How to Make Planters From a Wine Barrel

If you’re looking for a satisfying garden DIY project, try repurposing an old wine barrel. Wine barrels are made of sturdy materials and built to last even long after their original purpose has ended. This makes them excellent candidates for outdoor planters. Here we’ll go over the process and materials you’ll need to make your very own DIY wine barrel planter.

Materials

Wine barrel
Circular Saw
Pencil
Chalk line marker
Tape measure
Sand paper
Glasses or eye protection
Ear plugs
Protective gloves
Power drill & spade bit

Where to Find Wine Barrels

If you don’t already have a wine barrel sitting around, there are a few ways you can get them. First would be to look at any local thrift or second-hand stores, especially those with outdoor goods. If you have any vineyards or wineries nearby, you can contact them and inquire about helping them recycle. If all else fails you can always turn to online marketplaces to find the materials you need.

How to Build Your Planters

  1. First, turn the barrel on its side and use your tape measure to find the very middle. Once you have it, mark it with a pencil all the way around the barrel.

  2. Next, use the chalk line marker on the pencil line to mark where you’ll need to cut with the saw.

  3. Once the middle of the barrel is well-marked, carefully cut along the line using a circular saw. Make sure you and anyone helping you wear protective gear when using power tools. For extra stability, wedge the barrel between two cinder blocks or other heavy material as a brace.

  4. Once you have cut the barrel in half, use your power drill and a spade bit to cut drainage holes in the bottom of the new planters. For a planter of this size you should have at least 4 drainage holes.

  5. Carefully sand the edges of the barrel along where you cut it. This will help you avoid splinters, snags and other hazards when handling the planter.

  6. Repeat steps 4 and 5 for the other half of the barrel.

  7. Now you’re ready to plant! Add a layer of gravel to the bottom of your barrels before your choice of potting mix, then fill with your favorite flowers, plants or herbs. For a super easy gardening hack, place your plants right into the barrel, container and all. Nestled closely together the plants will appear lush and full but be much easier to transplant or remove if you ever need to make changes.

With this project you’ll have created not one but two wooden wine barrel planters. This is an excellent way to repurpose old materials and enjoy the satisfaction of DIY crafts. Now you can enjoy these planters in your garden, patio or even indoors for years to come.

DIYs with paint for your home

If you want a creative project that won’t break your budget, consider DIYs with paint. Painting an entire room or house can take time and effort, but smaller projects can be accomplished in a single weekend. You can even make your own custom decor by upcycling items you already own. Here are some budget-friendly DIY ideas with paint to try:

Decorate your coffee cup

Bring new life to your old cups and mugs by adding some paint. There are many kinds of paint you can use depending on what the cup is made of. Acrylic paints will work on most surfaces, but check the label to make sure it’s suitable for glazed ceramic, glass, metal or plastic. For a simple and modern geometric DIY paint project, try making angles and shapes with painter’s tape. Opt for metallic gold or silver to add a bit of shine.

Paint your chalkboard wall

Another fun DIY with paint is creating your own chalkboard wall. You can buy chalkboard paint at any craft or home improvement store and use it to transform any surface in your home. For a simple chalkboard wall DIY, section off a rectangular space on the wall with painter’s tape. Fill in the space with a solid coat of paint, adding more if the included directions recommend it. Once it dries you’ll have a perfect spot for doodles, lists and pretty cool inspiring messages.

Add color to drawers and cabinets

If you have dressers, cupboards or cabinets with drab, unpainted drawers, try adding a fresh coat of paint to the inside surfaces. You can add fun pops of color to the inside of dresser drawers and even the backs of shelves. The color choice is completely up to your preference, whether you want something bold and bright or neutral. Even a coat of bright white on the inside of a drawer can refresh the entire piece and make the storage space seem larger.

These are just a few of the best budget-friendly DIY ideas with paint. Try these and other paint projects to add new life to your existing walls and furnishings.

DIY Projects for home improvement in every room

No matter what room you’re working with, there are countless DIY projects for home improvement and decor. DIY home projects can help you save money while creating customized solutions for your exact needs and personal style.

If you’re interested in finding ways to beautify and enhance every room of the house, here are some suggestions to get you started.

Living room, kitchen & dining room DIY projects

A new paint job is one of the simplest and most effective DIY home improvement projects. If you want to transform your living room, just bring out the rollers and the brushes. The DIY option to update your house can be quite cheap and effortless to install.

Opt for neutral colors like beige and cream to brighten a space without limiting your other decorating choices.

Don’t forget, you can apply the same idea to kitchen cabinets, fireplace mantles and other surfaces. New paint is a cost-effective way to update the entire aesthetic of your living room, dining room or kitchen.

DIY laundry room ideas

Laundry rooms can offer some of the best opportunities for home improvement ideas. For example, install a cabinet above your washer or dryer for storage. If you have vertically stacked laundry machines, try adding adhesive or magnetic hooks to the sides.

To save space and add style, put your laundry detergent and fabric softener into mason jars or other small containers. Tucking the supplies away in storage bins or onto shelves will keep them easily accessible while decluttering the space.

Create a DIY memo board with chalk paint to record important reminders, laundry instructions and to-do lists.

DIY closet ideas

Improve any closet by adding DIY shelves with simple farmhouse brackets and wood planks. If you have cabinets in your basement or attic, increase their storage effectiveness by adding shelves or additional organization options.

Another easy DIY project is to transform your entrance closets into “mudrooms”. Adding hooks, baskets, or shelving is the most efficient method of helping everyone in your household stay organized and store their shoes, coats and other accessories.

For an added bonus, dedicate hooks for reusable shopping bags, spare keys and pet leashes.

DIY home improvement ideas can help you in any room of your home. Whether you want to improve functionality, storage or aesthetics, there is a DIY project perfect for you.

5 DIY Patio Upgrade Ideas for Your Backyard

A backyard patio can be much more than a simple concrete slab. Patios are a place to gather, relax and enjoy your outdoor space in a variety of ways. If your backyard doesn’t have a patio or if you’re looking to update the one you have, here are some fresh ideas for DIY patio projects to try.

Pavers

Pavers are one of the most DIY-friendly materials you can use for patios. Not only are they simple to install yourself, they come in a vast array of colors, textures and styles to match the look you want. You can mimic the look of a trendy brick pathway, elegant flagstone or intricate designs with materials that will withstand the weather and heavy use.

Outdoor Rugs

One of the most budget-friendly ways to upgrade an existing patio is with an outdoor rug. Finding the perfect rug for your space can completely change the look and feel while also providing protection from sun-baked pavement in the hotter months. Whether you opt for a rug with bright colors or a more muted palette, you’ll notice the difference right away. You can also use the rug as a starting point for an entire patio makeover including furniture, accent pieces and more.

Pea Gravel

Building a gravel patio is an unexpected and simple way to add functionality to your backyard on a budget. By constructing a simple frame out of lumber, you can fill the space with a layer of gravel and have an instant and inexpensive patio. Gravel comes in different colors and levels of grain so you can customize the look and feel.

Island Patios

For a bold take on the backyard patio, try moving away from the walls and create an island in the middle or outer edge of the yard. Your island patio can be round, rectangular or a custom shape. Connecting it to the backyard entrance with a simple DIY pathway or stepping stones will keep it connected, while adding a pergola or trellises can add privacy and mystique.

Add Color & Pattern

If you’re working with pavers or stone, you have the unique opportunity to add a bit of artistic flair into your patio design. Consider scattering decorative tiles or stones throughout in order to make a casual and eclectic mosaic for your backyard. Some ideas include pebble stepping stones, painted or carved paving stones or even completely custom works of art you make yourself. As long as the materials are hardy enough to withstand the elements and traffic in your yard, you have a plethora of options for adding some art into your patio.

Backyard patios come in all shapes, sizes and styles to fit your needs and creative ideas. If you’re considering either a brand new or updated patio, try these ideas and enjoy how they can transform your entire outdoor space.

3 Ideas for a budget-friendly floor project

With so many DIY options available, it’s never been easier to tackle your home’s flooring projects. However, there are a few key items to remember, such as material cost and experience required for installation.

Here are some ideas for cheap flooring ideas you can DIY:

Paint your linoleum or laminate flooring

It’s simple to dress up drab linoleum floors with a bit of paint. Durable floor paint adds a new color or refreshes the original color to hide imperfections. For this floor project, use an all-purpose interior paint primer and the floor paint of your choosing. Flex your creativity and use painter’s tape or stencils to create your own designs.

Try vinyl floor stickers

Vinyl stickers are a quick way to transform your floor for less, while still getting the vinyl floors you want. You can buy sets of peel-and-stick faux tiles in a wide variety of colors, patterns and textures. This is an especially good floor project option for those who want a big change without a big commitment or bill.

If you get tired of the vinyl, you can pull them back up and replace them with a new design anytime. Vinyl floor stickers cost less per square foot than other flooring materials, and significantly less than tearing up the entire existing floor.

Pour a concrete overlay

If you prefer the industrial design style or simply want a cheap flooring option that’s virtually indestructible, try a concrete floor. DIY concrete mix is available at every major hardware or home improvement store and is less costly than other floor materials.

Remove the existing flooring and add your concrete overlay in thin layers until you achieve the desired thickness. Concrete also has the advantage of being versatile. If you don’t like the original color, there are a variety of stain and color options to explore.

No matter which flooring material you prefer, DIY flooring projects are the most affordable way to go. Consider these ideas for your next DIY floor project.

Craft Your Own Miniature Plant Stand With This DIY Guide

Adding height variation to your plant collection can enhance the entire look of the collection. Even if you have your potted plants on a shelf, table or other surface off of the floor, some plants definitely benefit from sitting up higher. There are plenty of tabletop plant stands available on the market but they’re also easy to build yourself. Here are the materials and steps needed to make your very own miniature plant stands.

Materials & Tools

Square wood dowel
Dowel pins
Wood glue
Wood stain
Sealer
Rag
Plant pot
Measuring tape
Hand saw
Drill & drill bit
Sandpaper or power sander
Clamps

Process

  1. The very first thing you need to do is measure the diameter of the pot you want to use in the stand. If it’s a tapered or round shape, measure both the bottom and the widest point (whether at the top or in the middle).
  2. Measure and cut the wood dowel so that you have 4 “legs.” For the crosspieces, you’ll need one long piece and two smaller pieces to make the cross.
  3. Mark where the drill holes will go. Add drill holes to the center and either end of the crosspieces and into the middle of each side support. Make the holes approximately 1/2 inch deep.
  4. Use glue and dowels to connect the crosspieces. Add a bit of glue to the end of the dowel and fit it into each hole, clamping the pieces together to make sure it’s a firm fit. Once connected, you should have an X shape.
  5. Now add dowels into each end of the cross and secure them with glue. Attach the leg pieces by fitting the dowels into the holes you drilled in the center of each support. Use the clamp to hold everything steady while gluing.
  6. Make sure the glue is dry and check for any sign of wobbling. If you have some slight unevenness in the legs you can sand down the longest one or more to even them out. If there is a dramatic difference, you may need a hand or hack saw to correct it.
  7. Sand all the surfaces thoroughly to prepare for the stain or paint you want to use. Scrape off any extra dried glue you find, since it won’t take the stain or paint.
  8. Once you’re finished sanding and prepping, paint the visible surfaces and add a coat of seal afterward.
  9. Grab your plant pot and test out the stand. Check again for any signs of unevenness or wobbling and adjust accordingly. Experiment to find the best looking spot for your new tabletop plant stand to complement the plant itself as well as offer it the maximum light and air flow.

Homeowners Can Save Big With DIY Kitchen Island Innovations

If the cost of renovations holds you back from realizing your desired living space, strategic do-it-yourself projects can save money and accelerate the process.

It’s essential to understand that not every handy homeowner possesses the DIY skills to orchestrate a complete makeover. However, basic understanding of how to measure and use tools allow everyday people to make substantial living space improvements. In fact, more than a few motivated people can create a DIY kitchen island. Given that the meal preparation area ranks among the more expensive to upgrade, a DIY kitchen island can be a game-changer in terms of enjoyment and investment.

Popular DIY Kitchen Island Innovations

The kitchen has more foot traffic than any room in the household and that’s why many consider it the heart of the home. Perhaps the most dramatic change involves adding a DIY kitchen island. This asset allows family chefs expansive food preparation space and a place for friends and family members to gather over small meals and beverages. The following DIY kitchen island innovations illustrate ways you can save big while enhancing your home.

  • Farm Style Center Islands: One surprising innovation involves taking an outdated table or workbench and refurbishing it. Antiques often utilize sturdy hardwoods that can be sanded down, stained, and coated for kitchen use and fixed in place. These furniture items are usually created at the precise height of a modern center island and can be picked up at tag sales or junk stores for pennies on the dollar.
  • Dresser Updates: Like farm tables, a beat-up old dresser can form a DIY kitchen island’s foundation. Identify a piece of furniture that meets your desired height requirement. For instance, dressers of about 42 inches may accommodate bar stool seating. You can remove the top and craft a replacement that extends off one side for a seating countertop. It’s also perfectly acceptable to attach a more expansive countertop over the existing one. Given that repurposed furniture is inexpensive, you’re only paying retail for the countertop materials.
  • Rustic Built-It-Yourself: A DIY kitchen island does not necessarily require you to purchase a manufactured product. Fashioning a kitchen island remains remarkably similar to building a make-shift table or cabinet. Consider downloading basic table-making or cabinet plans and crafting one from lumber. Given that most homeowners are not finished carpenters, rustic designs and appearance can simplify the project.
  • Value of Shiplap: These interlocking boards rank among the more cost-effective home siding materials on the market. They are easy to manage and ideal for the exterior of a DIY kitchen island. This wood material can be installed on three sides of an island, leaving one side available for storage shelving. Shiplap provides aesthetically pleasing lines and can be painted or stained to suit. That makes it a cost-effective material to employ in a DIY kitchen island innovation.

Working families on strict budgets do not necessarily need to build up home improvement savings or leverage equity to enhance their living environment. By thinking outside the box and putting your creative spirit to work, it’s possible to make these DIY kitchen island innovations a reality.