Finding Space for a Custom Home Office

Image by Pexels from Pixabay

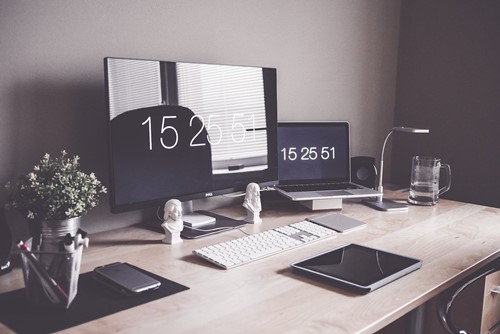
With more people working from home today than ever before, many are looking to add a home office to their house. Some may think that they don’t have enough space to make this happen; however, folks don’t need an entire room to add a home office. There are a few great tips and tricks that can turn almost any space into a comfortable, functional home office.

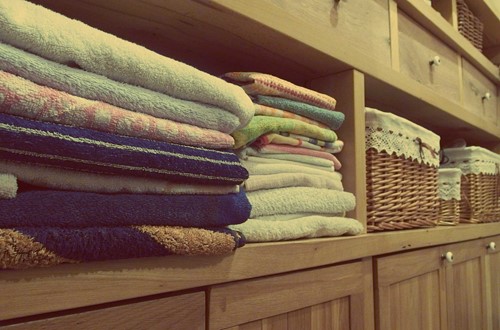
Turn a Laundry Room into a Home Office

One of the first places that should be looked at is the laundry room. With careful planning, along with some ingenuity, homeowners can take their laundry room and turn it into a functional home office. Clever carpentry can place a pull-out cabinet in the room along with a few heavy-duty drawer glides. By folding these key items into existing wall space, a seemingly small laundry room can turn into a beautiful home office. 

Looking at an Existing Bedroom

Another place that people can look for a home office is in their guest bedroom. This doesn’t mean that they need to take over the entire guest bedroom as their office space; however, the closet might offer some intriguing opportunities. Removing the door from the closet can add a significant amount of workable space. After all, some might not need a door in their closet at all. Then, think about using the closet rod to hang shelves and other useful items. Suddenly, with so much usable hanging space, the closet no longer seems nearly as crowded.

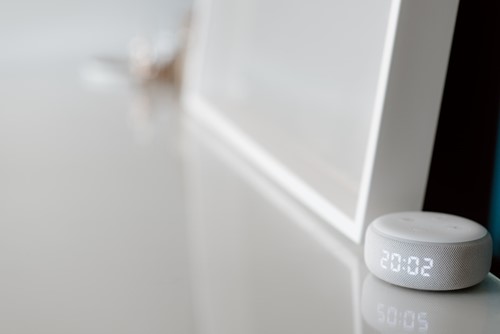
Put the Alcove to Use

Another great place to look for a home office is at an alcove. There are a lot of home structures that have quite a bit of awkward, recessed space. These nooks are great places to repurpose as a usable workspace for both adults and kids. This is a great location for kids to do their homework in addition to adults using this space to get their own work done. It might even be a good idea to add a double desk to increase the working space. A double desk will also create more room for storage and displays.

The best small home renovation ideas to upgrade your space

Small home renovation ideas are helpful when you need a change without a complete overhaul. There are many projects you can choose from to improve your living space, whether it be building a walk-in closet, adding a kitchen island or changing light fixtures.

If you’re in need of some ideas for a small house renovation, here are some ways to get started:

Open the floor plan

Interior walls divide small rooms and can eliminate many useful storage and circulation features. The same applies to kitchens in older houses, where the rooms were once thought to be isolated from the living room.

In case the kitchen and dining rooms adjoin each other but are separated by a wall, try removing the wall to open the space. In living areas close to the kitchen, the wall can be removed, so there are greater connections within each room of the home. 

Removing walls can also help exterior window lighting in a wider area and improve the house’s overall appearance.

Repurpose unused or underused space

If the rooms in a small house don’t have any particular function, think about repurposing them. The next step is reviewing the building process for the potential to increase the size, which will help you create additional space.

Some places with great opportunity for improving usable space are the garage, attic or basement.

Revamp a closet

Closets are incredibly important in daily life, so why not make them the best they can be? Simple DIY wardrobe revamps can improve your efficiency and allow for better storage.

Start with removing everything in the closet and replacing the interior walls with colorful patterns and colors. Choose functional items which offer multiple storage options, such as hanging shelves, storage boxes or drawers.

Incorporate banquette seating

For a practical and economical kitchen renovation, increase the size of the room by adding padded banquette chairs. Banquettes are a good way to save space, since most include built-in cupboards and storage cabinets. Add banquette seating to your island and transform it into a comfortable room for you to enjoy a quiet meal with friends.

Use built-ins where furniture would be too bulky

Functional storage spaces are essential for the small house. Built-in systems are designed to maximize spaces where furniture is inaccessible and can be customized according to room requirements. 

Shelving under the wall is the best solution to create optimum storage. Cabinetry is an excellent way of containing items, and it also keeps the home clean and tidy.

Add a sliding barn door

Using sliding barn doors for a hidden storage space in a dining and kitchen area makes for a beautiful and functional solution for your home interior. These sliding doors can be easily installed and even made DIY. 

Choose a design that will add to existing accents of the house. Or, paint your sliding door in a contrasting color to add drama to the room.

These are only a few ways you can upgrade your interior space without going overboard on remodeling. Whether you want to create more space or add better functionality to your home, these project ideas are the perfect way to begin.

Tool & equipment rentals: Show off your DIY skills without keeping the mess

Having a set of tools and equipment to call your own is great, especially if you’re an avid DIYer with ample space. However, there are times when equipment and tool rentals may be a more suitable option for you and your home projects.

Maybe your home isn’t large enough for a workshop. Perhaps you don’t use large equipment enough to outright own it. You might only need a few general construction equipment rentals for a new contracted addition, as outlined in your contract from your contractor. Regardless of the reason, there are a few basic things to remember when it comes to tool rentals.

When to rent equipment & tools

Renting smaller tools such as screwdrivers, hammers or even saws might seem a little over the top. And in many cases, it is. But when you have an entire patio that needs to be resurfaced, you may want to invest in renting a few concrete tools instead of just buying them.

Tool and equipment rentals are great when your projects are large one-offs, require the same commercial grade tools of the pros or slide easier into your budget. Consider how often you’ll be using the tools, what types of projects you’ll use the equipment for, the cost of ownership versus renting and the amount of room you have available for storage.

Rental equipment depends on your projects

Not all rental equipment and tool rentals are necessary for every project. If you’re working with a large amount of wood and want to cut it while in the thick of your project, you may want to consider renting items such as circular saws, saw horses and a sander.

If you find yourself closer to the facelift and aesthetic section of the DIY home improvement chart, try renting power washers and pressurized paint sprayers.

No matter the project, take time to scope out what you may need for it. Think about setup, safety – such as goggles, gloves and face masks – and clean up when, as well as the actual act of the project itself when creating your tool rental list.

How to rent tools and equipment

Most hardware and home improvement stores will have tool and equipment rentals ready. They’ll often post their rental rates and the rental period, so you can budget your time and money. If you need further assistance, try some light internet research, especially by checking sites that specialize in home improvement services.

Once you know what you’re searching for, you can either bring the list to a customer service desk or simply make the rental reservation online.

Regardless of your home workshop setup, it’s always worth exploring equipment rentals. If you’re still in the planning phases of your home projects, dig deep into the details of that particular activity and create a list of things you may need and their alternatives if what you need isn’t available.

And, as always, when in doubt, consult a professional. Even if they’re giving you simple tips, it’s always a good idea to have their experience in your ear when making home improvement decisions.

How to Choose Lighting for Your Closet

Image by B. Forenius from Shutterstock

There are some overlooked places in your home that need proper lighting. A good example is a closet. Whether a closet is small or large, proper lighting is essential for safety and good illumination. When building a new space or upgrading an existing one, these tips will help you choose the ideal lighting. 

Safety first

Closet lighting fixtures should be installed at least 12 inches away from where your clothes will be stored. Light and heat from bulbs can be harmful to your clothes especially if exposed for extended periods. Avoid heat issues by choosing LED or compact fluorescent (CFL) over incandescent lights. Using LEDs or CFLs in your closet provides the right amount of light, gives off less heat and saves energy. 

Halogen lights generate a significant amount of heat. They are not suitable for enclosed spaces like closets so avoid halogen fixtures in this application. 

Color temperature

Consider the color temperature of the lightbulbs you select. A color temperature within the range of 3000k-3500k provides bright, white light that is perfect for a closet. Selecting the right color temperature allows you to see the color of your clothes more accurately: no more guessing if your pants are black or dark blue.

Illuminate dark areas

Many closets include shelves and cabinets. Natural light or wall-mounted fixtures may not reach the far corners of these spaces. Consider installing under cabinet lighting to brighten the darker corners. Under-cabinet lighting comes in assorted sizes that can be customized for your closet. LED tape lights offer endless possibilities because of their thin profile and flexibility.

Choosing the perfect light for your closet can make big impact on your space. Keep these tips in mind as you plan your updates. If you do not have existing fixtures, consult with an experienced electrician to help with installation and placement.

Three Tips for Creating a Spacious Laundry Oasis

Image by Pixabay from Pexels

What do you picture when someone says ‘laundry’?  Is it piles of dirty clothes, sock singles lost to some undisclosed dimension, a moldy smell and lost hours?  Or is it shrugging on a warm shirt straight from the dryer, lemon scent and the zen of folding: a little pocket of peace and quiet on a hectic, cold day?

People who fit into the latter category aren’t from Stepford.  Chances are, they’ve made the deliberate choice to craft a laundry room the way they design other rooms in their house: for their comfort, convenience, and in the case of the laundry room, for utility and ease of use. 

Often a key component to creating a harmonious space is to minimize clutter.  Check out these three tips for creating a clutterless, clean, and welcoming workspace!

Incorporate Drying Racks

Drying delicates can create a lot of clutter!  Where do you put the stand-up drying rack?  Where to put it when you’ve folded it away? 

Solve that problem in a snap by making fold-away drying racks part of your interior design straightaway.  You can easily purchase or create cabinet-style drying racks like these:

The bars swing down for ease of use, but when you release them, they snap upright to keep your drying clothes out of the way.  Centsational Style shows you how to make your own here

Alternately,  you can incorporate rails on which to hang your clothing from hangers right in the laundry room, for things that are best dried while hanging, or just to store clothing that’s clean and ready to wear. These rails are best incorporated under cabinets or a ledge that may not be in use.

Even small spaces can make use of this trick.  Try creating a  hanging bar, made simply from two thick, leather straps and a copper rod (or metal rod of your choosing).  It looks incredibly upscale but would cost very little to make. Just fix two, 3-4 inch leather straps to a ledge or underneath weight-baring cabinets, then slide the rod through.

If you’re feeling crafty, you might also consider making an old ladder into a drying rack for a farmhouse feel.

Keep Your Laundry Basket Space in Mind

Keep laundry baskets out of the way by creating drawers or shelving space for them.  If you’re staging a house, buy baskets that fit so that these drawers’ purpose is clear to potential buyers — and so no one has to hunt for the right-sized baskets later on.

You can also create a laundry basket holder of your own from freestanding shelving units if you don’t have built-in drawers or have trouble finding a fitting that will work for your space.

Feeling crafty? Here’s a great article on how to create a do-it-yourself mobile laundry basket holder.

Keep Your Ironing Board Out of the Way

Your ironing board can take up a lot of space if you keep it set up, and it can be a challenge to yank it forward out of a nook or wrestle it down from a high spot if you keep it folded. 

Consider hanging it up on coat hooks.  Be sure to hang it so that the cloth of the board (where you’d grip it to lift) is at shoulder height, making it easy to set down and hook back up.

You can make one of these from scratch using these instructions from The Inspired Hive, but you can just as easily purchase one and unscrew any extraneous hooks before hanging it.

Employ these space-saving tactics and your laundry room will be a calm, peaceful, and orderly oasis!

Home Assistants: How to Get the Most Out of Yours

Virtual home assistants can be versatile, even if they’re still somewhat seen as a novelty to some homeowners. To really get the most out of them, though, you need to first understand what it can do. We’ll look at how your home assistant works and how you can add more efficiency to your routine by adjusting how you use it. 

Link Your Information 

This is the most important thing that you can do with a smart home assistant: the more you have on one system, the easier it is to control. So if you have home automation, such as an automated security system or lighting, you can input that information to make it easier to maintain functionality. You can also link your financial information, making it possible to buy what you need by just making the request.

Integrate with Everyday Tasks 

If you want to dictate your to-do list to a technology that will record it all, smart assistants can be a great way to capture the details. So instead of missing one ingredient for a new recipe or forgetting to call the plumber to fix the leak in the bathroom, you never miss a beat.

Assistants are also great for setting timers, making phone calls and reminding you to stick to a schedule. Many people find that their productivity improves when they use these assistants, making it easier to stay on track without feeling overwhelmed. 

Get More Information

Traffic back home, weather, your work schedule: you can use smart home assistants to give you the information you need to get up and running daily. Similar to your to-do lists, this can be everything you need to prepare for your day. You can also make your updates more aligned with your priorities, whether they’re a technical necessity or not.

Maximize Your Home Entertainment 

Books, movies, podcasts, music: there are ways to link your services and control your home entertainment with nothing more than your voice or a smartphone. Use virtual assistants to increase the volume, play in surround or select a song you might love.

Remember the Features 

These features make it possible to mute the device, change the default names and teach the AI more about your personal preferences. It all makes for a more intuitive experience.

How to DIY your windows for this winter season

Planning for the cold weather months saves homeowners time and money. The financial savings involve reducing drafts and the energy losses, causing your bill to decline. These rank among the do-it-yourself home insulation strategies worth considering.

1: Address screen doors

Many storm doors come with sliding glass panes and a screen option to allow fresh air to flow into the home. These products appear reasonably secure against drafts with the glass lowered. But that’s not necessarily the case.

Storm doors typically are not installed with preventing air leaks in mind. One DIY way to improve them is by applying plastic insulation around the pane-screen system. Homeowners can use the same inexpensive plastic shrink-wrap kits used to cover windows.

2: Add insulation to attics

A home’s attic ranks among one of the largest areas for heat loss because the heat from the lower levels rises to the attick. So, your furnace may be triggered early and often. Even if your attic has reasonably sound insulation, consider adding a little extra where heat loss is likely to happen.

3: Permanently winterize windows

The plastic shrink-wrap kits sold in stores are a yearly renewal commitment. However, there is an alternative to performing this task and spending the extra money each winter. If outdated and inefficient windows cause cold air leaks, replacing them may be worth considering. But if the drafts seep through the casing surrounding the window, you may be able to eliminate the cold air inexpensively.

Consider removing the interior lumber surrounding the window without damaging the walls. Once removed, inspect the space inside the wall to see if it has secure insulation. If not, deploy an insulation product best suited to solve the issue. A wide range of reasonably-priced spray foam and loose fiber products can solve the problem.

Although winter chills will bring higher utility bills, homeowners can minimize costs with improved insulation. The root cause of energy waste revolves around cold air leaks. These and other DIY efforts can prevent unnecessary expenses.

Which Home Improvement Projects Add Value to Your Home?

Home improvement projects not only help you personalize your space to suit your style, but they can also boost your property value. When you are investing in a home improvement project, it’s important to choose one that is going to allow you to enjoy the greatest return on your investment.

These home improvement projects typically add the most value to your home:

Kitchen Remodel

A kitchen remodel is one of the most costly home improvement projects that you can take on, especially if you decide to renovate your kitchen from the ground up. However, this is also one of the most valuable investments that you can make in your home. A renovated kitchen can provide you with anywhere from a 50 to 80 percent return on your investment, depending on the choices that you make and the amount of money that you invest in the project.


New Windows

Installing new windows in your home is an improvement project that will increase your quality of life inside your home while also ensuring you enjoy a generous return on your investment when you go to sell. It is important to opt for energy-efficient windows to get the most cost savings and see the highest returns. Don’t forget about the rebates and tax credits you may be eligible for when you invest in energy-efficient windows.

Improved Deck or Patio

When you make a commitment to improve your outdoor living space, you are investing in your own enjoyment of your home. However, a freshly painted deck or a new patio can also add a lot of value — either project can offer a 30 percent to 60 percent return on your investment.

Basement Refinishing

Finishing the basement in your home can transform this storage area into a new, functional living space. If you add luxury features, such as a full bathroom or a wet bar, you may find that you see an even larger return on your investment from this project.

Any home improvement project — regardless of its size or scope — is going to require an investment of your time, energy and financial resources. When you select value-added home improvement projects, you may find that your investment pays off in dividends when you list your home on the market for the highest possible price.